Showing posts with label Amy Tan. Show all posts

Monday, September 14, 2015

#Challenge52Kits Brooklyn Flea - December 2011

Brooklyn Flea... where was I in December 2011? Absent perhaps.


ABOUT BROOKLYN FLEA | Not your typical December kit, not super Christmas-y, and I LOVED that it wasn't!


Brooklyn Flea + Salvaged add-on leftovers minus the card stock

REALITY | But reality is, I might've made 1 or 2 cards with this kit MAYBE, and that's it. I hardly remember this kit at all, except later thinking how much I loved the look of it, but never got around to working with it! I had only purchased 1 add-on kit, so maybe that's part of why I didn't do much with it or remember it well.


A LAYOUT | For this layout of my family eating dinner together for my daughter's 2nd birthday, I scraplifted this older layout by SC user paperandpetals because I really liked the banners and getting to use a bunch of those papers together! Plus I used up a bunch of those nice buttons!


BONUS PROJECT | Going with the theme of last week and using my layout as inspiration to make a card from the kit as well, I made this card base. It's just the start of a card, because I want to be able to use it for any occasion, maybe a thank you, maybe a boy birthday... but this way I have a quick start and idea all ready!


CARD UPDATE 10/2015 | I ended up needing to send some photographs to my Grandma's friend and of course, I couldn't send just an envelope, so I finished up this card to send along with the photos! I added some foam adhesive to the bottoms of the banners to make them stand out a bit more and then stamped and embossed the sentiment at the bottom. I was a little skeptical how I could use that card base, but it was perfect for this occasion and so glad I had it to work from to send out some really quick mail!


NEXT UP | County Fair from January 2012 - One of my top 3 ALL-TIME favorite kits I think! Why? Mainly because of Amy Tan's Stretch Your Kit class that got me to make 9 layouts with this kit and really gave me permission to USE my beloved supplies instead of hoard them!! It will be interesting though to see what I have leftover and how I am going to squeeze another layout with it. I think I actually made 10 layouts total.

Tuesday, July 8, 2014

My New Ride

ABOUT THE PHOTOS:
Natalie's grandma brought over this riding toy zebra, so Chris put it in the front lawn where we were sitting. The first thing she did was climb up and stand on it with her feet on the seat haha!


LAYOUT DESIGN:
I used another older sketch template from the Simple Scrapper, because I had already printed my photos 4x6 and 2 at 3x4 and was sort of stuck on how to lay them out till I saw this one from the archives!


MY PROCESS/PRODUCTS USED:
I used the Hello Hello kit from Studio Calico, except for the background piece of paper which was a piece from Amy Tan's original collection Amy Tangerine by American Crafts - I went to my stash because I wanted a neutral grayish piece, but didn't want a plain card stock.

Sunday, November 24, 2013

Dedication To Our Lord

Natalie had her baby dedication a couple weeks ago at church! Her face in this picture is priceless! She was not a happy camper right before we went up there, but luckily she didn't cry at all during it.


I used this month's Cuppa kit from Studio calico and got some inspiration from these two layouts by Amy Tan and Sasha Farina, specifically I liked how Amy divided her page to make it look like a mega phone and I liked how Sasha added in the white paper (except I just added white strips instead of cutting the paper and mounting on white). Unfortunately, with my black letter stickers, I was out of L's and S's and only had 2 H's so I was very limited what I could write (I thought about Jehovah Jireh but that requires 3 H's) so I picked some additional white letters from Heidi Swapp. I stamped underneath and above with my giant roller alpha stamp to spell out Natalie's name.


For the bottom portion, I just used a bunch of the printables for this month's kit from In a Creative Bubble as well as some cardstock stickers from Hello Forever, which made it come together really easily!

Saturday, September 7, 2013

#CANALSIDE

4 days after Natalie was born, we took her to her first Doctor's appointment (because of the weekend) and then we took her for her first walk in her stroller! Who knew she'd love it!


My inspiration came from this layout by Amy Tan using the new Studio Calico kit, Double Scoop!


I used the digital cut file by Studio Calico to cut out the stamp background on white paper, then stamped over the die cuts with Hero Arts inks - love the coordinating stamps and diecuts!!


Granted, we didn't walk very far since I was still healing from delivery, but it was great to get out and get some fresh air! We have been so blessed with this season that Natalie was born in - able to get out for lots of walks and have the windows open in the house!


Monday, August 26, 2013

Introducing my daughter Natalie!!

Wow, what a whirlwind the last 12 days have been, 12 days ago I started going into labor and 11 days ago my daughter arrived - all 7lbs 15oz of her, Natalie Jordan! By day 2 till about day 7, I thought, I will NEVER EVER have time to scrapbook again! (Chris also thought this about taking bike rides.) But day 9 came and just to feel normal again, I ventured into my space while Natalie napped and Chris biked, and I scrapped my first page of my daughter - something I've always wanted to do, even before we decided to have any children! It felt great, and then yesterday I scrapped another layout - and today here I am posting them... just have to be better with your time!


Onto this first layout, I had some memorabilia from the hospital - her little footprints as well as our hospital bands. I put this together really quickly, because I was so scared she was going to wake up and I'd not get another chance to scrap for awhile! I used the Marks & Co. kit from Studio Calico and stamped and embossed in silver.


The only part that didn't come in the kit were the Journal letter thickers from Amy Tan's sketchbook line. The long white letters filled that space perfectly!


For this next layout, I wanted to complete the other side with a couple more from the same group of pictures - my little one getting weighed and measured and cleaned off. She was so good for them, and didn't fuss or cry after that initial cry out the gate. That seems to be her personality so far too, she's not fussy and only cries if she's hungry. She's so amazing!


OK so anyway, I got the layout idea from Challenge 7 of the Stashbusters Anonymous class I signed up for at Big Picture Classes with Aly Dosdall. I cut the letter background at the top with my Silhouette - purchased from the Silhouette store.


I used paper from the Marks & Co. kit again but added in paper and embellishments from Amy Tan's Yes, Please line.


Some simple and quick layouts but I am excited to get a good start on Natalie's baby album!

Friday, August 9, 2013

Love This Place

Another layout from our road/day trip to Canandaigua and Naples, NY - this time we headed to Naples and found this awesome place, the Arbor Hill Grapery & Winery! We ended up hauling home a bunch of wine jellies (amazing!), sparkling grape juice (the best!), sauces, and even some concord grape gummy bears and licorice!


This layout came together quickly again! I got my inspiration this time from this great layout by Amy Tan! I had some random ephemera from Arbor Hill to include, so it was easy to see how that layout could work for what I had too.


The hardest part for me was cutting up that gray chevron type paper backing the stitched "Love" word... I cut into a whole new 12x12 piece of paper just to get that! OK, breathe...


I used the newest kit, Marks & Co. by Studio Calico, except the washi tape was from last month's kit. The main portion I am proud of is the little reddish-orange asterisk at the top! The pack of asterisks only came in blue, gray, and yellow... so I stripped the front off one of the asterisks, then first painted it with white watercolor paint (like a primer, as Chris so nicely pointed out)! Thinking in those terms I could've used some gesso, but the watercolor worked fine. Waited for it to dry, then added that reddish-orange watercolor on top, waited for it to dry. Then I wanted it to look shiny like the others, so I added some glossy accents and let dry! Now it looks like it came just like that!

Tuesday, February 5, 2013

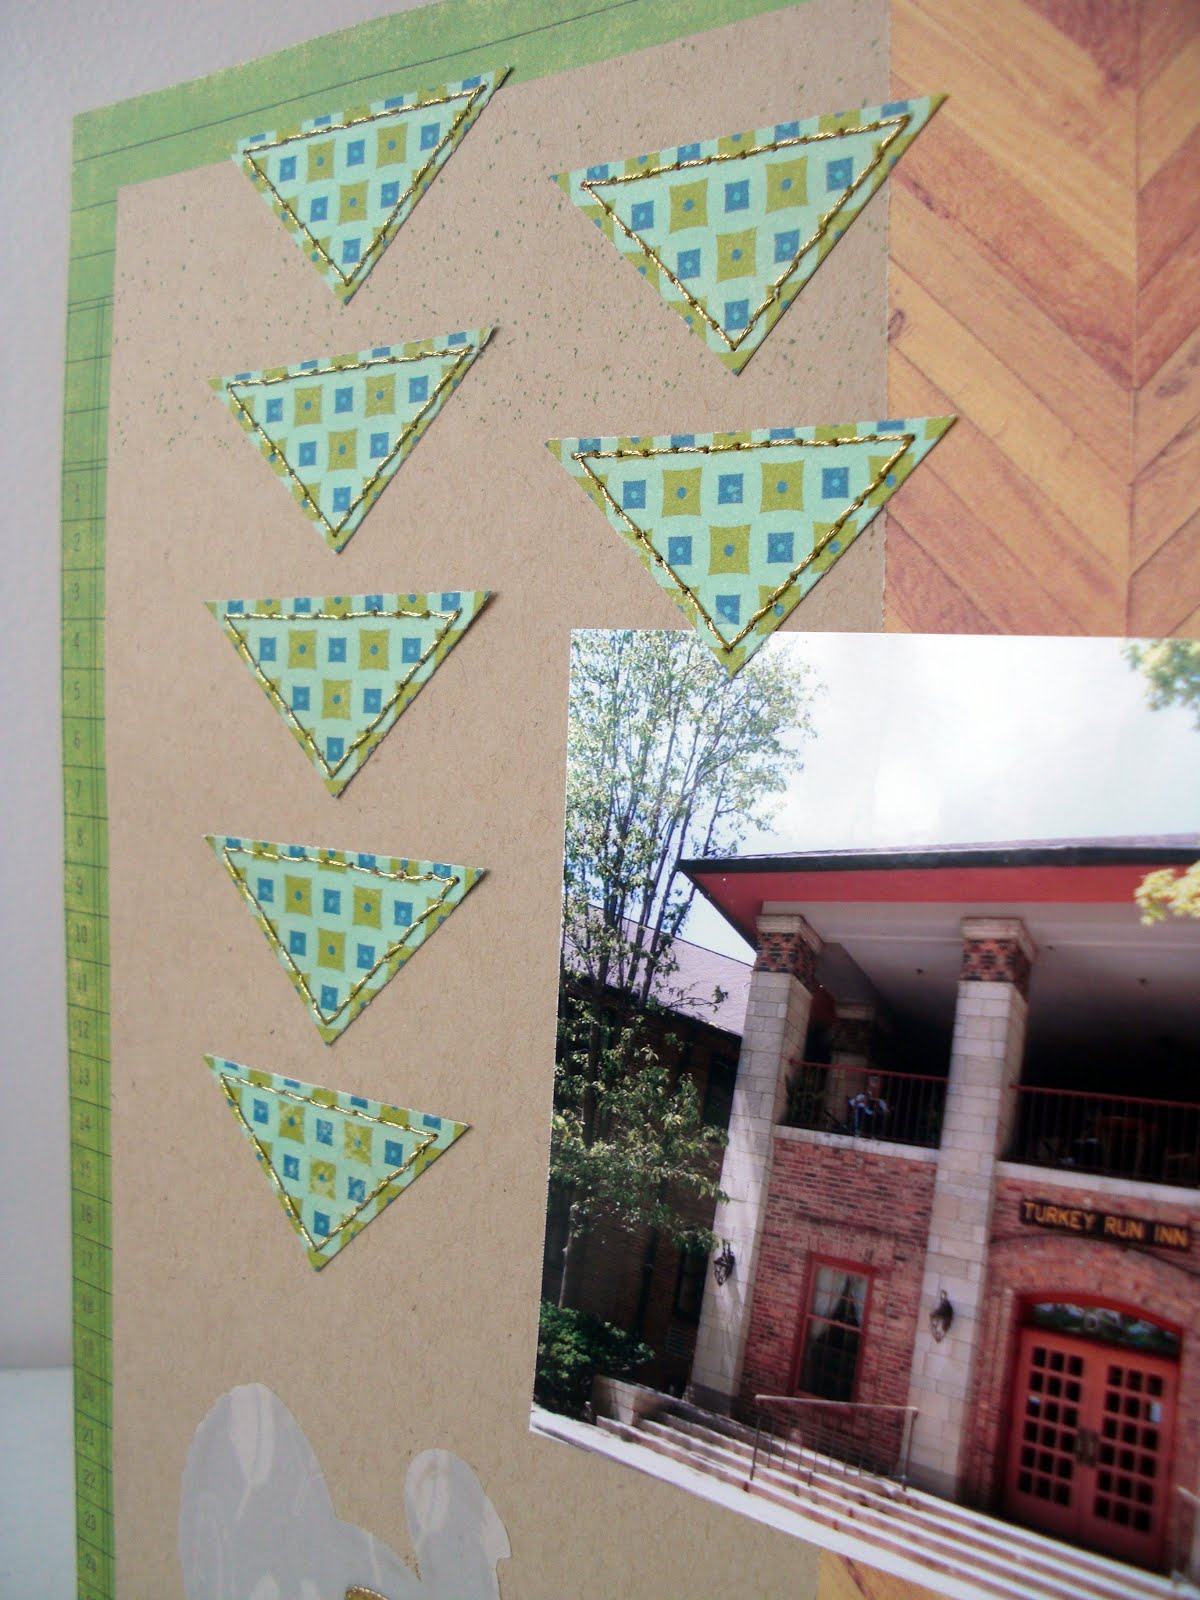
Turkey Run layout!

Wow, it took me till February to complete my first 12x12 layout of the year! In my defense though, I have been sick with morning sickness... cuz I'm PREGNANT! That's right! God has blessed me and my husband and I'm a little over 12 weeks into this thing! We got to hear the heartbeat again this morning, and that just never gets old :) So anyway, this layout has been on my table for going on 5 days now, because I seem to have morning sickness in the evenings these days... but it feels great to have one completed!


I had one more layout to do to finish up the Indiana trip last May to see my cousins. We went out one day to Turkey Run State Park to go on the trails we used to when we were much smaller... I believe the last visit was around 1994, while my Dad was still with us. My parents and my Dad's sisters and brother and their families - we all stayed overnight and ran around the trails and had a blast!!


The idea for this layout came together quickly, from the first challenge for the Studio Calico online class I'm taking this month, Bright Ideas with Nicole Samuels! Our first challenge from Amy Tan was to use a stencil - so I cut the Turkey Run title with my Silhouette, and at first used it as a misting mask. But my misting went awry... my bottles were clogged and I got more mist on my hands than the page... so plan B! I used the mask to color in the area with my Zig emboss pen and embossed with Gold glitter Zing embossing powder! Then because of the gold, I wanted to add a little more so I hand stitched around each triangle with gold thread (that part took the longest).


I'm excited to get some more 12x12 layouts done this month, especially once my nausea subsides, which will hopefully be within the next couple of weeks! Loving the class so far too :)

Sunday, September 23, 2012

Time To Relax

Last weekend, I was "practicing" remembering to take a picture everyday, in anticipation of December Daily, that I will be participating in for the first time this year! So I caught Chris last Sunday, having fallen asleep on the couch while watching football and snapped a quick Instagram :)


When I saw Amy Tan's fall layout here, I knew I wanted to do a scrap lift of the page with the pic of Chris! So on Friday, I went out and took a picture of our house, on the last official day of summer! Just some real life, random photos :)


I used a combination of the Central High kit and Amy Tangerine Ready Set Go line to create the page, which made it super fast and easy!


HOW-TO:
  • All the paper and embellishments are from the Ready Set Go line by American Crafts, except the journaling box from Studio Calico
  • The main yellow houses background piece of paper I used is Lounge Fest, the green solid paper is Green Light cut to 9"x8", and the green stripes with houses is Get Cozy cut to 4.5"x10.5"
  • I cut the title bubble from the piece of paper called Conference Call, and then cut a rectangle roughly the same size from the Surrounded Kraft paper - for this, I used my new Fiskars 3-in-1 Corner Squeeze punch! This is exciting because for awhile I have been wanting a corner punch that doesn't make as rounded a corner as the old corner rounder I had, and this new Fiskars one, on the least-rounded setting, makes exactly the amount I was looking for!
  • Anyway, I backed the heart in the house embellishment with green striped washi tape so the journal card wouldn't show through and added some paper leaves from the original Amy Tangerine line by American Crafts

Friday, February 10, 2012

Best Memories

Do I seem unusually productive lately? It's because I am getting lots of inspiration and ideas from this online class! Here's the layout I did from the 3rd lesson. The best part is that I didn't have to cut any of those paper strips - they were all leftovers from the previous 2 layouts!


I printed my journaling onto Kraft paper and cut them into little pennants to make a sort of Top 10 list! I love that number stamp from the County Fair kit from Studio Calico! Oh by the way, the strips are all crooked "on purpose" because I accidentally stamped crooked down the strip of paper and couldn't go back! So I altered my page from being straight pieces to crooked haha!


I did more stitching into this layout, and love the added touch it gives!


HOW-TO:
  • The background paper is "Big Sky" from the Sasparilla collection by October Afternoon
  • I used scrap strips of paper and embossed the number stamp down the lightest colored strip
  • Print your journaling, cut them into separate pieces
  • Add simple stitch around pictures
  • I used doily flowers from Jenni Bowlin Studios
  • The letter stickers are Black & Cream sticky keys from October Afternoon