Showing posts with label scrapbook challenge. Show all posts

Tuesday, September 29, 2015

#Challenge52Kits Daydream Believer - February 2012

Daydream Believer was one of the first kits I remember being sold out of stuff REALLY fast! This was a good one!


ABOUT DAYDREAM BELIEVER | Lots of girly, frilly, lovely products for this one! I didn't have a daughter back then, but sure wished I had! Since it was just me and my husband, I didn't do a lot of layouts with this one. It's actually hard for me to believe that I only got one add-on kit with this one, but maybe that's because I also bought the entire Dear Lizzy Neapolitan line on its own separately!


Main kit + Lady Lane leftover

A LAYOUT | I don't know why, but I really struggled with this layout, well I struggled once I had the pictures printed. I pushed paper for two days and really had trouble deciding what direction I wanted to go with this one. Finally I saw the layout, "Hello Fall" by Kat Benjamin and decided to do a scraplift!


SEWING | The best part about doing this layout was once I cut out the heart on my Silhouette Cameo and pierced my paper, I was able to take my sewing upstairs with me and get that whole part finished while Natalie played with her "manger people" in the living room and Daddy was able to sit through an entire Bills game without having to shut the tv off, grumbling about the whole season being done haha! It was quite relaxing, especially while I drank some warm apple cider!


BONUS PROJECT | Making a card based on my layout was easy for this one, I just kept it simple too and made a birthday card and left a little bit of space at the bottom for a name, maybe stamped or with some thickers.


NEXT UP | Story Hour from March 2012, I remember this one quite well because I just LOVED this kit, with a lot from the Crate Paper Storyteller line, first time seeing Kesi'Art papers, and the unique and versatile colors! I got 3 add-on kits and made 9 or 10 layouts. I found the different types of embellishments for this one as well as the papers made it easy to come up with a lot of layouts quickly, so it'll be interesting to see if I get stuck again with this one finally.


Monday, September 14, 2015

#Challenge52Kits Brooklyn Flea - December 2011

Brooklyn Flea... where was I in December 2011? Absent perhaps.


ABOUT BROOKLYN FLEA | Not your typical December kit, not super Christmas-y, and I LOVED that it wasn't!


Brooklyn Flea + Salvaged add-on leftovers minus the card stock

REALITY | But reality is, I might've made 1 or 2 cards with this kit MAYBE, and that's it. I hardly remember this kit at all, except later thinking how much I loved the look of it, but never got around to working with it! I had only purchased 1 add-on kit, so maybe that's part of why I didn't do much with it or remember it well.


A LAYOUT | For this layout of my family eating dinner together for my daughter's 2nd birthday, I scraplifted this older layout by SC user paperandpetals because I really liked the banners and getting to use a bunch of those papers together! Plus I used up a bunch of those nice buttons!


BONUS PROJECT | Going with the theme of last week and using my layout as inspiration to make a card from the kit as well, I made this card base. It's just the start of a card, because I want to be able to use it for any occasion, maybe a thank you, maybe a boy birthday... but this way I have a quick start and idea all ready!


CARD UPDATE 10/2015 | I ended up needing to send some photographs to my Grandma's friend and of course, I couldn't send just an envelope, so I finished up this card to send along with the photos! I added some foam adhesive to the bottoms of the banners to make them stand out a bit more and then stamped and embossed the sentiment at the bottom. I was a little skeptical how I could use that card base, but it was perfect for this occasion and so glad I had it to work from to send out some really quick mail!


NEXT UP | County Fair from January 2012 - One of my top 3 ALL-TIME favorite kits I think! Why? Mainly because of Amy Tan's Stretch Your Kit class that got me to make 9 layouts with this kit and really gave me permission to USE my beloved supplies instead of hoard them!! It will be interesting though to see what I have leftover and how I am going to squeeze another layout with it. I think I actually made 10 layouts total.

Monday, August 31, 2015

#Challenge52Kits Field Guide - October 2011

Let's go back to October 2011...


ABOUT FIELD GUIDE | I loved a lot of the soft colors of this kit, but mixed in with some of the darker elements from the Nightfall collection by American Crafts made it lovely, like a light fall evening.


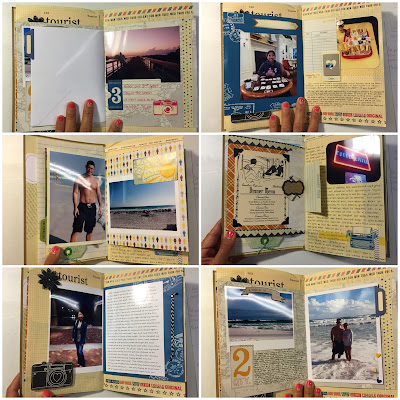
REALITY | Like I said in my last post, I tried to make a mini album with it because the papers were so gorgeous but ended up having to toss it because it came apart and I never finished it anyway. However, I did use the Almanac add-on to actually complete a full vacation mini album with that awesome Amy Tangerine mini book (scroll down to see the inside)!!


Field Guide leftover

Perennial leftover

Greenhouse leftover

Almanac leftover


A LAYOUT | OK, so I was just reviewing some older layouts from my Inspiration book and found this layout by Lisa Dickinson and thought that would be a fun one plus I had some pics of our lunch (and dinner) from Freddy's on our last day of vacation in Florida that would go perfectly! I used the same font, Pacifico, in my Silhouette to cut out my title. The only thing I would've liked to do differently maybe would be to pick a different background color for the strips of paper - that yellow is a bit strong, but oh well.

VACATION ALBUM | Check out the below images - I used a lot of Amy Tangerine products, as well as some from the October Afternoon Boarding Pass collection. I finished all but the last couple of pages, but didn't have a whole lot to put in them anyway, so it really doesn't bother me.


NEXT UP | So join me next week as I tackle a bit of a tougher one for me, Handmade from November 2011! I'm thinking some pics of my daughter and my Grandma together might pair well with this kit!

Monday, August 24, 2015

#Challenge52Kits Glee Club - September 2011

This was my 2nd kit that I subscribed too, I remember it well - Glee Club!


ABOUT GLEE CLUB | I was excited that this kit still included some bits from Amy Tangerine's original line, some more BasicGrey Out of Print, as well as some of American Crafts' Nightfall collections. So excited I bought a ton extras from all 3 of those collections also from TwoPeasInABucket.com...


Glee Club scrapbook kit leftover + more pp and SC paper

REALITY | When I was gathering this kit back together from the four corners of the earth, I mean, my scrapbook room, I only noticed 1 piece of paper that was used a little, and then I found the project I used it for - the background paper for this card! Ugh, I think, other than some of the alphas, and the stamps... that's really it, wow. The sad part is, I had bought ALL 4 add-on kits too, ok there's no time like the present right!


Pep Squad leftover

Debate Team leftover

Home Ec leftover

Thespian leftover

REALITY CON'T | I really wanted to delve more into this kit, but this week I had some other projects going on, so didn't get to use as much up of this kit as I would have liked! I definitely want to make some cards with it, as the paper is just gorgeous, but also I would really like to use up those special hand stitched tags from the Home Ec add-on! That will definitely go into my personal challenge bucketlist haha!


A LAYOUT | So here is the layout I made with this kit! I knew I wanted to go with the travel theme of some of the supplies in the kit, and also use that circular paper. Which reminded me of circles, which reminded me of this sketch template from Simple Scrapper that I had used once before. I decided not to worry that I have already used it and just used it again, and this time it's a whole different look with the Glee Club kit! This layout was just one of those that came together quickly and easily once I decided on a sketch template and cut out the circles with my Silhouette! I'm glad I finally used a paper clip and two brads, plus a border strip - each taken from a completely untouched package of supplies!!


NEXT UP | Oooh, Field Guide - one of my most favorite October kits!! I had previously tried to create a small mini album with a bunch of these papers, but never finished and I didn't sew it very well so the book actually started coming apart, so I think I trashed it :( BUT I know I have lots of goodies leftover and hope I can find some great pictures to go with this kit!


Monday, August 17, 2015

#Challenge52Kits Boardwalk - August 2011

Boardwalk, boardwalk, boardwalk… It's been 4 years since I received this kit and hardly touched any of it!


ABOUT BOARDWALK | When I first saw Boardwalk, and all the beautiful teals and greens and blues… I swooned, actually it's what put me over the edge and made me finally sign up for a Studio Calico subscription after a few months of stalking SC. I happily purchased 3 add-on kits: Sea Glass, Boogie Board, and Tide Pool, as well as add-on patterned paper, and SC paper (an add-on that came with 2 extra sheets of each SC paper)!


REALITY | I hardly touched ANY of it, except for a few cards and a couple of layouts. And I didn't cut into a single piece of paper that I didn't have a back-up of. That was the time though - I was just coming off my Creative Memories mindset, where I would have so much product and extras of everything that I got used to a security blanket of having doubles of it all so I didn't have to worry about "using up" any single thing!


Boardwalk leftover

Seaglass leftover

Boogie Board leftover

Tide Pool leftover with Hambly Screen Prints transparency!

GATHERING SUPPLIES
| So it took a bit of time, but I was able to find all the original supplies and papers from the kit and add-on kits... because I didn't use up and throw away a SINGLE thing! I would even bet I have at least a scrap of every paper too, but anyway, for this particular kit, with all this untouched stuff, I plan to keep most of this kit together as a way to motivate me to use some of the items I wouldn't use one-off. Except for the stamps and probably the brads and letter stickers, the rest I will probably keep together now.


1st card, extending the grid theme from a previous project

quick card using some scraps

PROJECTS | As soon as I had gathered up all the supplies for the kits, I just HAD to make something with it again! It was almost like getting a new kit in the mail, seeing all the supplies together again, was like a family reunion, or better yet... a 10yr high school reunion! (Long story short, that's how my husband and I started dating...)


GETTING STARTED | When I began my first layout, I really wanted to challenge myself and try to use mostly the Tide Pool add-on instead of the obvious Boogie Board add-on... but I just couldn't get it to work, so I started over and thought I needed to bite the bullet and cut a circle from the map paper instead...


OBSTACLE | So after I had picked out a Sketch Template from this month's Simple Scrapper membership materials, I had to change it up slightly so I wouldn't cover up the pretty map paper circle I so bravely cut up! Then I added an extra circle to help balance the layout. I forced myself to try inking up those Pink Paislee Mistables collection letter stickers - which I did with the Hero Arts Ombre ink in peach. They came out a bit darker and muddier than I wanted, but I'm proud of myself for trying it out instead of leaving them white! I added a border strip sticker from the beloved Sassafras line and had to use some brads and twine to really make this a period piece haha!!


MOMMY | First I printed out my photo 5x7 because it was so cute and bright! Then I started by doing a scraplift of this layout by Studio Calico member Ashley888 that I had seen 4 years ago now! When I went to do the title, it didn't really fit in the same area, I moved it and decided to paint in some journaling lines there instead with some goache paint! After that, I just felt like it didn't need the extra stuff at the bottom so I left it mostly blank and added a label with the date and embellishment.


NEXT UP | So next week my plan is to pull out all the supplies for the kit from September 2011, Glee Club! And it should be even more fun since I had purchased ALL 4 Scrapbook add-on kits!! Stay tuned...

Oh and if you made any layouts this past weekend, feel free to link up in the comments here no matter what kit you used!!

Monday, August 10, 2015

#Challenge52Kits

So I'm ready to shake things up a bit here on my blog and on my Instagram and start a yearlong challenge for myself, but it can be shorter for YOU, however long you can join in, or even just for a few weeks!


Confession: I have been a Studio Calico subscriber non-stop since August 2011 (even though I started purchasing in May 2011). By this November I will have purchased 52 complete main scrapbook kits, of which I haven't exactly "killed" a single one!

So yesterday morning it dawned on me, I should try to make one more layout with every kit I have! And then I figured I should do this, once a week and post it and make it a challenge that anyone can join in on with any kit club or any project! So here is my plan.


My plan is to work on a layout on Saturdays, posting my progress to Instagram, then posting on Monday morning to my blog. On my blog I will show the kit I worked with, plus whatever add-ons I purchased (a LOT back in the day, hello 3 of the 4 Scrapbook add-ons for the first month!) and also what supplies I had left over! This should get interesting come February 2013 Front Row… I seriously have lost all the paper to that kit hahaha! If I get the time, I can also try to dig up the links to the projects I already created with that kit as well.

Here's one I created with the first kit I am going to use, back when I used to create double page layouts:

I want you all to hop in at any time and comment on the current week's blog post what you all worked on over the weekend, even if it's a different kit than what I'm working on!

Wednesday, April 15, 2015

Smile

This was the 2nd best moment at Disney - getting to meet Merida! She was our first meet & greet, so we weren't sure how Natalie would respond, but she practically jumped out of my arms when it was our turn, and was saying "hug Merida, hug Merida!" She had never reached for a stranger before that, so I was surprised and excited for her!


This layout was a fun one to make - I took on this Pinterest challenge posted by Welobellie awhile back - here's the inspiration piece:


Basically I saw that and wanted to make some origami-like squares! I started folding and then flipped them over and adhered. Since I used such strong patterns, mostly papers from the Penelope add-on kit from Studio Calico for the Odyssey release, I placed it all onto a white piece of card stock... oooh! Anyway, I enjoyed the challenge and it was a great way to knock out another layout!

Thursday, July 31, 2014

You & Me

ABOUT THE PHOTO(S):
I finally got around to scrapping these photos from December! I had printed them out but ended up blowing up the one of me and Natalie to use in a single layout, so didn't have a place for these. I decided these will go in Chris' album instead, which is why I haven't worked on them till now - because I usually try to stay up to date on Natalie's album as my priority (sorry Chris)!


LAYOUT DESIGN:
Anyway, I finally got a chance to participate in a @Society52 challenge on Instagram! It is run by Sarah Bargo and Maggie Massey (a Studio Calico Creative Team member) - they post 1 challenge every Monday and a new spin on it every Thursday! This week's challenge was to use NO patterned paper, aaahhh!! And the spin was to add some black to it!


MY PROCESS/PRODUCTS USED:
I sort of cheated since I didn't start the layout till today during Natalie's nap time. I started and finished this layout across 2 of her naps, so it took me about an hour and 15 minutes - super fast! But I had already decided I wanted to do a grid and use the Printshop collection by Shanna Noel at Studio Calico, so I had a good head start. I did a very quick splash of Mister Huey's spray mist in Passport, dabbed dry, then I sewed in some lines an inch apart and filled the spaces. Originally I was going to place a title above the square photo, but went outside my comfort zone to make the "You & Me" vellum piece work as my title!