Saturday, September 28, 2013

Monkey Face

So today my daughter is sick (me too) and was feeding every hour... I had about 10-15 minute intervals when she was asleep to scrap so I worked on this layout in my "More Happy Little Moments" book! It is strange to scrap 10 minutes at a time!!


Anyway I printed this pic that I put on Instagram of our little monkey face girl!


I stamped the cameras on one side and added washi tape to the other (pretty obvious), added some paper from the class kit and some other random bits and called it a day!

Wednesday, September 25, 2013

Joy Ride

A few months ago I took the class "More Happy Little Moments" with Maggie Holmes over at Studio Calico. I knew I would want to make a book for my daughter, but since I hadn't had her yet, I held off on starting the book (other than the cover). I've finally decided that I'm going to put Instagram snapshots and any extra photos that won't make it into a 12x12 layout, into this book! Here's a couple pages I worked on today of an Instagram shot of Natalie in her car seat!


I cut the car from the Silhouette, which is an Amy Tangerine cut file from the Silhouette Online store. I used vellum paper and just outlined it with pen to show up a little better. I also used her Thickers from her Cut & Paste line for the title.


I punched some pinking circles from the right side of the page, and went around each one with some watercolors to make the shape show up better. I backed with some paper that came in the More Happy Little Moments kit, and added some digital diecuts from Hello Forever that also came in the kit. Finally, I just added a bunch of rub-ons to fill the spaces!

Sunday, September 22, 2013

Love These Moments!

More and more I am realizing that a great majority of what really makes a great layout starts with great, high quality photos! What a difference when I use our nice DSLR camera versus when I use my iPhone or point-and-shoot! And I only got these printed at Walmart, so I imagine how awesome they'd turn out if I got them printed at a "real" photo processing venue!


Anyway, this is the left side to my last layout, from when we took Natalie outside randomly, to have playtime outside! I just used the auto setting for the photos, but having awesome daylight also makes a huge difference. Too bad I couldn't photograph my layouts in such high quality!


Again, I used the new Amy Tangerine Cut & Paste line by American Crafts! I had already cut that inside square piece of paper, when I was thinking my layout was looking really square-y, so I decided to cut the pictures into circles and add other circles to it! I cut the Love Love Love bubble from my Silhouette, which was a digital cut file by Studio Calico this month. Once I had the idea, this layout came together quickly and easily!

Saturday, September 21, 2013

Love

This is one of my favorite photos of Natalie (and Chris) so far! We took her playmat outside and played with her in the shade in our front yard! It was so nice to get some fresh air and good lighting for some photos!


I bought a bunch of paper and embellishments from the new Amy Tangerine line, Cut & Paste by American Crafts! I let the background paper dictate how this layout came together, and just added in some of the bits here and there, some thickers for the title and some chipboard shapes!


This layout literally took me about 20 minutes? It was very fast, something I've gotten better at since having a newborn baby, who can wake up at any moment and derail scrapbooking by several hours or a couple days!! She was good though, and waited till I completely finished this layout before I had to feed her :)

I Love You

First thing's first, you may notice the photo quality of these pictures on my blog are not as good as before. Two reasons for this: 1. I haven't had time to take the photos with my camera, edit them, and then post... and 2. my daughter prefers to nap during the day in the napper in her Pack 'n Play which resides in our bedroom, which is the only place I've found that has good daylight to take the photos. As a result of 2., point 2-1. is that I had to take the photos with my iPhone in the basement where my scrap area is, so no daylight and not the highest resolution...


Anyway, for this layout of Chris getting ready to put Natalie to bed, I used the Double Scoop kit by Studio Calico again! I knew I wanted to use those stamps at the top though, so I embossed in white on dark navy blue card stock.


For the tag at the bottom, I used some older label stickers and placed them on the label and let them go off the edges. I inked up the front of the wood veneer shapes with Hero Arts Neon yellow ink and added that Bananafish Studios label - I am loving those labels from the kit!

Proud Papa!

We had a bunch of guys from church over on what happened to be Natalie's 1 week birthday! We ordered pizza and wings from Pontillo's, which was amazing and hung out and watched a little preseason football afterwards. Natalie was so good - she slept in one of the guys' arms the entire time (minus having to get up and feed once)!


This layout was mostly dictated by the shapes of the photos I wanted to include. 2 squares and a rectangle - let's make a grid haha! Not very innovative, but works for me! 


I used the latest Studio Calico kit, Double Scoop on it. It came together very quickly, so that is the part I am most happy about!

Tuesday, September 10, 2013

My Family

I just LOVE these pictures I got of Chris and Natalie after her first sponge bath at home (at like 5 in the morning because we weren't yet on any sort of schedule haha)!!


This layout came together very quickly! I knew before I even started it, that I wanted to cut out some of the frames from that piece of paper. I created the large colored frame for the photo by cutting it from a piece of paper, then penciling in a frame to look like the frames on the background paper!


I just embellished with patterned paper, stamps, etc. till it looked complete - easy and fun to work on!

Sleep Tight

How cute are babies when they are swaddled!? I never really thought so until I looked at my baby girl all swaddled up, and especially with that hair!! She is too cute! Of course this picture is from about 2 weeks ago, when she liked to be swaddled... now at 3.5 weeks old she has already grown out of it and doesn't like it anymore haha!


I just loved this layout by Nicole Samuels, and scrap-lifted it pretty closely except with different papers etc.


I used the latest Studio Calico kit, Double Scoop and the newest stamp set, Cotton Candy! I embossed the diamond stamps in white Zing embossing powder then cut them out with scissors.


I made my own tag out of some large chevron patterned paper, cut out the two corners with my circle punch and added the circle sticker and twine from my stash. I didn't think I would, but I love the label set from Bananafish Studios (that smile tag is one of them) that came in this month's Studio Calico add-on, Sprinkles! I thought I would hate having to cut them out, but I actually like it better that I can see all of the labels and then only cut out the one(s) I want to use - plus I don't have a very high-quality printer to print the labels that nicely anyway.

Saturday, September 7, 2013

1st Walk

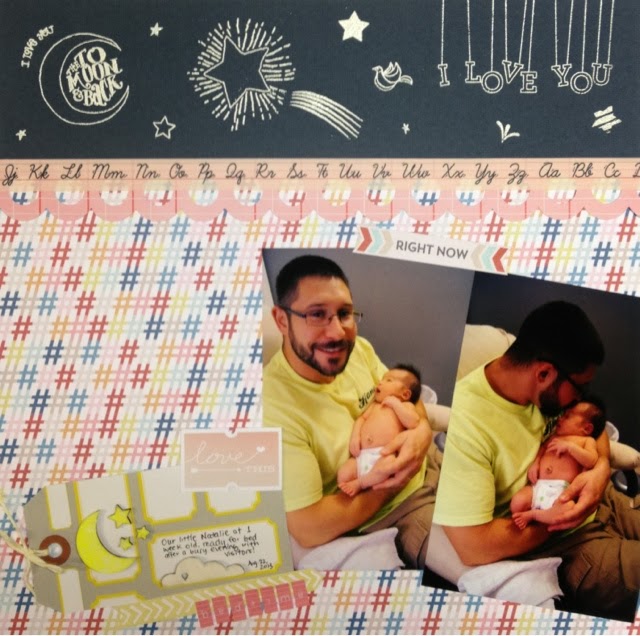
Same set of pictures from the last layout - taking Natalie out for her first walk in her stroller along the canal! The best part was in our conversation, Chris said the stroller wouldn't collapse with the car seat adapter in it, but if it did, he would call Baby Jogger and yell at them "your stroller clam-shelled my baby!!" Hahaha, clam-shelled! That gave us such a good laugh after a lot of sleepless, crazy nights!


Anyway, I got the inspiration for this layout, loosely from the last sketch for the Stashbuster's Anonymous class with Aly Dosdall over at BigPictureClasses.com. After that I grabbed some scrap pieces of paper in various sizes off my table to arrange them on the page in different ways till I liked this arrangement, and cut the same size pieces from the papers I wanted! This might be the best way I figured out to cut specific size scraps that work for my page! Usually I just try to use a ruler and eyeball it, but having actual pieces of paper (without cutting into my good paper) to move around worked well and quickly!


For the embellishments I cut the clouds, banner, and flowers from that same piece of background paper from the Cut & Paste collection by Amy Tangerine for American Crafts! The rest of the embellishments and the papers etc were all from the Double Scoop Studio Calico kit!


I'm happy with how fast this layout came together! This month was the first time in awhile that I ordered the "More Patterned Paper" from Studio Calico and so glad I did, since I haven't had any issues with cutting into the papers for just a square or small piece etc, and especially because I tend to use a whole sheet at a time for an entire background since I don't usually use plain card stock for my backgrounds. Maybe I should do this more often! :)

#CANALSIDE

4 days after Natalie was born, we took her to her first Doctor's appointment (because of the weekend) and then we took her for her first walk in her stroller! Who knew she'd love it!


My inspiration came from this layout by Amy Tan using the new Studio Calico kit, Double Scoop!


I used the digital cut file by Studio Calico to cut out the stamp background on white paper, then stamped over the die cuts with Hero Arts inks - love the coordinating stamps and diecuts!!


Granted, we didn't walk very far since I was still healing from delivery, but it was great to get out and get some fresh air! We have been so blessed with this season that Natalie was born in - able to get out for lots of walks and have the windows open in the house!


Friday, September 6, 2013

Faces!

After Natalie's first feedings at the hospital, Chris and I asked each other, are we supposed to burp the baby after EVERY feeding? We just had NO IDEA about anything about caring for a baby! By Day 3, when I took these pictures, we were burping her regularly and noticed how cute and funny her faces are when she gets burped! She goes limp in the arms and just seems to really want to be burped!


I decided to dig into my stash and use up some of the original Amy Tangerine line by American Crafts! I did this after being inspired by the last challenge in the Stashbuster's Anonymous class over at BigPictureClasses.com with Aly Dosdall! I'm so glad I signed up for that class this month even though I knew I was going to give birth because I ended up having more time to scrap than I thought I would - thanks to the joys of newborn nap times and having off from work!


Oh man, her little monkey face is my favorite!! I liked those cloud stickers because they looked like little thought bubbles as well and went perfectly with the pictures!


For the second page, I kept it really simple. I just added some strips of paper along the bottom - those strips are the bottom tabs I tore of a bunch of different sheets from the same line of papers and stuck them down there. I really just wanted to fill in the space since I didn't have any more journaling to add.


That face, those cheeks... She's too cute, but of course I think that because she's my daughter!


Monday, September 2, 2013

Home Sweet Home

We brought Natalie home from the hospital 2 days after she was born, which ended up being my actual due date. (Hard to believe that was only 2 weeks and 2 days ago!) We had had a rough 2nd night with her, as she started to become hungry and need diaper changes... and so when we were getting ready to take her home we were so scared she would scream and cry the entire way. Luckily, she, along with lots of other babies, was soothed by the car ride and was just fine! We got her home, safe and sound :)


My main inspiration was the latest member video from Paperclipping.com - I used papers from the Valley High kit by Studio Calico to start, but then added random embellishments to complete.


I cut the Home Sweet Home die cut with my Silhouette, that I purchased from the Silhouette online store.


Hoping this good start to Natalie's baby album keeps up so she doesn't get to be 5 years old before I finish it!