Thursday, December 29, 2011

Happy Birthday Matey!

This pirate-themed birthday card isn't too "young" for a 30-year-old husband and father of a friend of mine, right!? Even if it is, at least his wife, my friend, is also a scrapbooker and is used to seeing these homemade cards :)


So at first I was going to use my new Buccaneer cartridge I got for my Cricut Imagine, but realized I am basically running out of black ink! The blue surrounding the "Happy Birthday Matey" greeting is supposed to be black...


So I had to nix the pirate monkey, and used the Life's a Party cartridge to cut out a treasure chest the old school way - layering multiple pieces of colored paper! Oh well, it still came out nice and fun!


HOW-TO:
  • Cut the "Happy Birthday Matey!" at 4" on the Cricut Imagine Buccaneer cartridge (I had it print and cut in layers so I could popup the "Birthday" portion)
  • After I realized that blue was supposed to be black, I decided to outline the letters with a thin black pen to make them stand out a little more
  • Using Bazzill paper, I cut the treasure chest, each piece at 2.7" relative size, from the "Life's a Party" Cricut cartridge
  • The piece of background paper is from the Nantucket collection by Pink Paislee

Wednesday, December 28, 2011

Thank You Card - Paper Flower

This is a special thank you card for an elderly couple I've never met! They know my Mom from the library where she works, and sent us a very beautiful silver tray as a wedding present for me and my husband! I definitely wanted to make a special card for them.


I won't lie though and tell you this was easy to do, especially because at the time of making this card, I only had this picture to look at and couldn't find the instructions on how it was done! I studied it as closely as I could and saw it was probably 8 circles folded and placed together to form one big circle...


After many practice attempts and finally agreeing with myself on a practical method, I started cutting and folding... it was only AFTER I finished the whole thing that I found this blog entry to teach a much easier way to fold the pieces! Oh well!


HOW-TO (The HARD, fastidious way that I taught myself):
  • Cut 8 circles approximately 2" in diameter
  • Fold once in half, fold from there in half to have 4 quarters... unfold, then fold in half, and fold the sides down along the crease in the middle - unfold and you should have 8 "pie pieces"
  • This is where it got tricky... I used my scoring blade in my trimmer to score 2 lines - for each line, start at the same "bottom" end of a crease, and go up/outwards at a 45 degree angle, to form a "V"
  • Fold in along one side of the V, then fold part of that flap back aligned at the middle... then repeat on the other side
  • Repeat with each circle
  • Cut one 2 or 4" circle and fold similarly till you get 8 pie pieces
  • Put double sided adhesive on one side of the circle, then stick each folded circle into each pie piece
  • Add button and voila!

HOW-TO (The EASY way that I didn't see until I finished the hard way):
Side note: The materials I used were "Countryside" paper from the Farmhouse collection by Crate Paper. The button was from the matching farmhouse collection flea market buttons. The background paper was from the Amy Tangerine collection by American Crafts and the letter stickers are Teeny Alpha teal wood grain by Glitz.


Friday, December 23, 2011

A Christmas Card

I do not make lots of cards to send out at Christmas... not yet anyway. Maybe someday I'll get my act together enough to do this, but until then, my friend Kara was the lucky recipient of this year's only Christmas card I made (so far but probably at all)!


I got the idea and steps for making the tree from this blog entry from BasicGrey. It was more difficult than it looked, but once I realized these 2 things (after a few practice tries on plain paper that are in the garbage now):

1.) How to actually fold the half circle (the folds do not have to come from the top... if that makes sense)
2.) You have to start with a pretty big circle pattern to begin with to get a decent sized tree


HOW-TO:
  • I used "Fly a Kite 'Wish' Ribbon" paper by My Mind's Eye and cut out a circle using the "inner" circle in the big circle pattern template from Creative Memories, cutting out a circle with approximately an 8.75" diameter (This made the tree the perfect size for a 5x7" card).
  • Cut the circle in half (I folded it as best I could, then trimmed along the fold)
  • From here, I recommend folding on a practice sheet, then when I finally got it just right, I used it to know where to fold the real half circle I was going to use by placing the practice over the real one and folding as close to the same folds as I could
  • I usually can't stand scrapping in such an inexact way, but knew I could cover the imperfections at the top with a star
  • The star is from the Holiday Style Flower Sack by October Afternoon
  • The background paper is "All the Trimmings" paper from the 12 days of Christmas collection by My Mind's Eye that came in the latest Studio Calico Brooklyn Flea kit
  • The Christmas sentiment is a rub on from KaiserCraft that I randomly found in my stash as I was picking out the background paper!

Wednesday, November 30, 2011

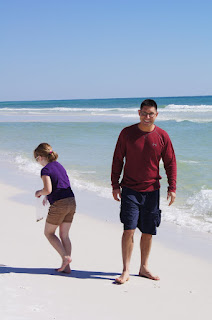
These pics just make me smile

While we were in Florida, I was trying to get a few shots of Chris at the beach... hehe :)


Hopefully I'll find somewhere to scrap these! Nothing quite like capturing a moment that made you both chuckle at the time...


Saturday, November 26, 2011

Pro-Tech Family Day

I finally finished this 12x12 layout I started awhile back... but oh well it is finished now! Back in July, my husband's company had a family day, so all their families came and got a tour of the shop, ate burgers and hotdogs under a tent, watched some of the Blue Angels practicing overhead, and then to top off the day, they had an ice cream truck pull in and give us free dessert!


The left side, with the big banner was an idea I took from this older project by Nancy Damiano. Then I remembered I had those little chipboard banner pieces to match the theme!


I put together the right side first, and didn't have to do a whole lot with it, since the paper was so detailed. Just added some buttons here and there and taped the picture to a piece of Bazzill cardstock. Easy!


HOW-TO:
  • The paper is from the Anthology Collection by Studio Calico
  • For the left side I cut a rectangle out of some shade of gold-ish Bazzill cardstock, and on the back I drew a line up the center, drew a dot about an inch or so up the line, then cut with scissors from each corner to the dot to get the middle as evenly placed as possible
  • The chipboard banner pieces are from Maya Road
  • I used the Yellow & Black sticky keys from the Boarding Pass collection by October Afternoon for all the letters
  • For the right side I stamped and embossed a zigzag border stamp from Studio Calico and cut it out by hand
  • The buttons are from the Lost and Found collection by My Mind's Eye

Sunday, November 20, 2011

Watercolor-like

Someone in our family is pregnant! And someone in our family needed to make a card to congratulate that someone, even though they found out about it like a couple weeks ago, but was too sick to leave the house or make a card for that time! I am better and I got to utilize a new technique I saw from this blog post!


I've owned those Tim Holtz distress inks for awhile, but so far have only ventured as far as using them with a dry applicator to "chalk" or blend light backgrounds. Def never tried adding water or using my fingers to do some finger painting!


Um, I have 4 different color fingertips now - dusty concord, peeled paint, faded jeans, and vintage photo. Of course AFTER I showed off my newly colored fingers to my husband did he tell me he had some latex gloves in the basement. OK next time I will see how those work out so I don't look like a crazy person!


HOW-TO:
The cool thing about this technique is I actually stamped the image first, embossed it, and then finger-painted over the whole thing! It was cool to see it come to life since it was white on white paper. The video in that blog post shows how to do it, theirs came out much cooler, but this is my first project doing this so hopefully I will get better. Plus I didn't have watercolor paper (just used white Bazzill cardstock) and I didn't have the "pearlized water" she mentioned, I just used good ole free tap water!

Thursday, October 13, 2011

Bar Mitzvah card!

This card was definitely a challenge, in terms of trying to think of anything else to put on it besides the star of David. Luckily we got a beautiful invitation, and a light bulb went on inside my head and I determined I could use whatever the image was on the invitation, plus it was on such nice card stock that I couldn't just throw it away!


The "window" portion of the idea came from this cool blog entry.


The hardest part was cutting out the square with the exacto knife - having to cut through both the heavy card stock and the Kraft paper, but I love how it turned out!


HOW-TO:
  • The Kraft cardstock was cut to 8.5x6" folded in half to make the front 4.25x6"
  • Cut (invitation) blue card stock to 4x5.75" and wrapped Jillibean Soup twine around the bottom a few times
  • Using a Studio Calico wood veneer frame, I tried to mist it a little with Mister Huey's Clay mist, but realized quickly that it doesn't really stick well to the frame, but didn't want to end up inking it too dark, so after that attempt I just left it as it was
  • I laid the frame down to where I was going to place it, and traced with pencil along the inside square, where to cut out
  • Took the exacto knife and cut out the inner square, peeled off the back of the frame and placed it down, then cut a little extra along the inside of the frame to make sure it matched perfectly!
  • Inside the card, I added the image from the invitation and placed it to show a bit off center through the window
  • The letters are chipboard alphas from Studio Calico
  • The little metal button was an afterthought, so I had to pull up the paper a bit, cut the twine from the back, loop through the button from My Mind's Eye Lost and Found collection and re-adhere everything back down!


Tuesday, October 4, 2011

Fall Bash Layouts!

This year, I participated in Fall Bash, which was an all day scrapbooking event at Mendon GC, about half an hour away. It was so much fun!! Hmm, what was my favorite part? The friends, the extra amount of space than we usually have at the retreats, getting to come home to my own bed or the wait staff?? I can't decide, but it was great and I'm hoping Terri (from Scrapbook Creations who hosts these events) does another next year!


OK this first layout didn't take too long to figure out, but sat in front of me all morning before lunch. I love the colors in the Sassafras paper on the left!


I misted the paper on the right side to draw in the cool blue colors from the left. I love spray mists and convinced some friends there to try it!


HOW-TO:
  • The main paper is Enlighten from the Sunshine Broadcast collection by Sassafras on the left and on the right is New York from the Boarding Pass collection by October Afternoon
  • I used those same Amy Tangerine by American Crafts Thickers for the letter stickers on the left from the previous layout I posted
  • I used Mister Huey's Bluegrass to mist the right side
  • The chipboard clouds are from Studio Calico as well as the trim called Scraps from their Memoir collection
  • The entwined bloom embellishment is Turkish turquoise from Sassafras


This layout was really fun and easy! I finally got to use the American Made collection paper from My Mind's Eye, and created my very own homemade embellishments to match, by making the pinwheels that were pulled from the pattern on the paper!


Several people at the bash asked me how I made the pinwheels, and after seeing how they came out, I am addicted! I joked that I wanted to make pinwheels on every page layout from now on!


The best part is that you can make them to any size really. I wanted to make mine a bit large to cover more area on my page.


HOW-TO:
  • The patterned paper on the left as well as the punchout banner along the top are from the American Made collection by My Mind's Eye
  • The cardstock on the left I bought while at the bash, I believe is called Midnight or something like that, from Bazzill
  • TO MAKE THE PINWHEELS:
  • Cut 2 2x2 inch squares from double-sided patterned paper
  • Cut each square in half to make 4 triangles
  • Fold up one edge of each triangle towards the middle
  • Cut one more 2x2 inch square from plain paper that you don't care about and add adhesive to one side
  • Place the 4 folded triangles lined up against the plain square
  • You should be left with little to no excess of the plain square showing through, but cut any that you see off with scissors
  • I used a button from the Stella & Rose collection by My Mind's Eye with a glue dot to the middle of the pinwheel to hold it down
  • Voila! Easy homemade embellishment!


Finally, this last layout I was getting really tired, and had to complete it at home, but I still like it!


I dusted off the old hexagon maker from Creative Memories, to create the honeycomb pattern, which I accidentally sprayed with mist that was a bit too dark, so I tried to cover it up with little butterfly embellishments. I guess I could've made some die cut bees, but was too tired, so the butterflies took over their nest!


HOW-TO:
  • The left side paper is from the Hello Sunshine collection by American Crafts and the right side is a newer paper from Pebbles that came in the Glee Club kit from Studio Calico
  • The letters on the left are Chipboard alphas from Studio Calico and the butterflies are Sunbeam delights by American Crafts
  • I basically just punched out hexagons in various sizes out of Kraft cardstock and lined them up fairly randomly on the page to fill the area I needed

For the retreat in November, I am def going to drink more coffee and bring more projects to work on so I don't get to that stopping point! I am so excited though, especially since this one day event was like a warm-up for the 2.5 day retreat!

Thursday, September 29, 2011

A Day at Sea... or Creek

I finally got a chance to do my own scrapbooking this past weekend! Even if it was just one page layout, it felt great! Here we have a kayaking scrapbook layout from a sunny summer afternoon earlier this year. It was so much fun!


My husband Chris is def the type to go his own way, whereas I'm more of a rules follower... so I was a little shocked to turn around and find him following his own shortcut through the reeds. I assumed we'd get stuck or capsize, but I guess we were ok!


The best part was the other couple that passed by us, heading back to the paddle center asking us how far we had come out because they had been lost for a few hours and looks so tired! Chris and I had a chuckle about that after they passed... and shortly thereafter, we decided to turn around before we became them and also got lost!


HOW-TO:
  • The main paper was the Aldrin paper from Studio Calico that was in their June kit Paper Moon, the colors just matched perfectly!
  • For the left side, I cut the American Crafts black paper to 10"x10" and the American Crafts leaf (green) paper to 9.5"x9.5" on top of the black
  • The letter stickers are Peacock Lovely Thickers from the Amy Tangerine line by American Crafts (they are molded foam rubber stickers)
  • The buttons are from the Boarding Pass collection by October Afternoon and looped a bit of twine in one of them from part of the Daily Junque collection by House of Three/PinkPaislee
  • The camera stamp and sentiment are from Studio Calico, and I cut the circles using the cutting system from Creative Memories
  • By the way, since I used 2 12x12 sheets of that main Aldrin paper, and only had 2 sheets of it, where did I get that extra bit to make that circle? I'm glad you asked! Because I did not want to waste that good paper and since most of it on the left side would be covered by the middle square, I used my trimmer to cut a large square out of the middle before mounting the black and green squares on top of it! I did the same for the black paper on the right side. No need to waste the entire 12x12 if you can help it!
  • For the right side, I misted an Inkessentials #5 size manila tag with Applejack Mister Huey's spray mist
  • The circle part of the tag, I colored in with the Zig Embossing Pen and embossed it with Leaf Zing embossing powder by American Crafts before using the same twine color to tie around the end
  • The sticker is from the Amy Tangerine by American Crafts sticker book

Friday, September 23, 2011

Faithful smasher

I finally did a "series" of Smashbook pages that I love! I am using the Green Smashbook for my bible study notes, as we're going through the book of Genesis on Wednesday nights.


Love these first 2 pages because I got to use some more stuff from the Amy Tangerine line by American Crafts:


Also, chapter 24 is really awesome to re-read once you realize the amazing correlations to the new testament and what everyone represents...

These next 2 pages use mostly stuff from the Out of Print line by BasicGrey. That's a rub-on in the lower left corner and for the piece going off the right side of the page, I actually just cut that out of one of their pieces of paper. The little arrow is from the Wander collection, also by BasicGrey.


I love that little golden nugget from Pastor Dave - Will you go on a journey with the Holy Spirit to one day meet Jesus?

Chapter 25-26 pages were completed with the use of Elm letter thickers by American Crafts, journal box sticker by Sassafras, and Studio Calico chipboard clouds that were inked with Tim Holtz wild honey distress ink. I finally got the Uniball Signo white pen in the mail, after hearing all the rave reviews people had about it and I gotta say, it is definitely something to rave about! It is such a bold white but you only have to write with it once, so you can do fairly small letters and still have them stand out.


Grace upon grace. Enough said!

Friday, September 9, 2011

A Nontraditional Wedding Card

Love, love, love this card for my BFF's wedding that I will be apart of! The Amy Tangerine line by American Crafts is my absolute favorite line of scrapbooking products! This is my first use of these products (finally). I can't wait to use more, since I basically bought everything I could find from the line and hoping to get more as I use them up and figure out what I like best :)


How awesome is that heart fabric paper!? Pretty expensive (for a piece of paper, except that it's fabric), and has a bit of a strange smell, but I just adore it and was so happy to get a chance to use it right away! It is definitely worth the cost!


HOW-TO:
  • The only non-Amy Tangerine product I used was the purple shimmer cardstock - that came in the Creative Memories Frightful Halloween Specialty Paper Pack
  • I cut the Falling For You Fabric paper (hearts) to 4.5" x 6.5" onto the 5x7 card
  • The "all you need is love" banner is from the Wishing fabric stickers
  • The letters are Lovely Mulberry and Lovely Peacock Molded Foam Rubber Letter Stickers
  • The potty people are from the Let's Go Dimensional Stickers

Saturday, September 3, 2011

A Birthday Card

I have a TON of scrapping to do this weekend... this one had to be done today since it is for my sister-in-law and we are celebrating her birthday tonight, a week early since we'll be out of town next weekend for her actual birthday.


Perhaps I should've kept with the same color scheme from the original idea seen here, but I just love the cool colors that were part of the Boardwalk kit from Studio Calico!


HOW-TO:
  • Even though you probably can't tell, I first sprayed a piece of Vanilla cardstock from Creative Memories with Mister Huey's Lemonade mist
  • Used aFiskars border punch for the right border and the Creative Memories mini square maker all punched from Studio Calico paper
  • I used regular twine, My Mind's Eye Lime Twist twine, and Daily Junque by Pink Paislee House of Three twine and tied them around each square (very carefully) - my only trick here is to cut off an extra long piece to tie big loops then pull them tight to a much smaller size
  • The "Happy Birthday" letters are also from My Mind's Eye Lime Twist while the letters for her name are Teal & Cream Sticky Keys by October Afternoon stuck to circles made with the Creative Memories mini circle maker and popped up
  • The camera stamp is new from the Amy Tangerine line by American Crafts, probably my newest favorite line of scrapbooking supplies; it is embossed with Teal Metallic finish embossing powder also by American Crafts and colored the heart in with a red marker

Side note: After I brought the card out to the backyard where my husband was cleaning his four wheeler (ATV), I showed him the card and he replied "I like how you've been doing lots of emblazoning lately" HAHAHA, this was his way of saying embossing - he always mixes up the terms but the ones he comes up with are so funny :)

Wednesday, August 31, 2011

Simple Strawberry Thank You Card

Two things surprised me about this card:
1. I actually used an old(er) cartridge on the Cricut to create the strawberries
2. I forced myself to cut into a fully good piece of 12x12 paper by My Mind's Eye - this is a very difficult thing for me to do!


I would've popped up the strawberries except they are covering a previous cut into that Bazzill dark green dotted swiss paper, so had to keep it flat, boo.


HOW-TO:
  • Cut strawberries at 2.5" using the Cricut Preserves cartridge from My Mind's Eye Alphabet Soup Boy "Ziggy" Paper
  • I have been dying to use that ribbon because it came in a pack of 3 that included stars and polka dot patterns - it is from Queen & Co.
  • Stapled the ribbon to the Bazzill paper with the Tim Holtz Tiny Attacher - love this thing even more than I ever thought I would!
  • Thank you and shout out to my friend Kara for supplying me with the little rhinestone embellishments, they are Grass Green also from Queen & Co. - wow, didn't even realize that, so they were definitely made to match this card!
  • The letters are Chipboard Alphas from Studio Calico that came in their August main kit: Boardwalk

Friday, August 26, 2011

This is how I feel


I found this picture on the site Pinterest.com here. This month I am working on a separate project that can't be posted, so I feel like I've lost my momentum a bit, but not to worry, I will be back in action next month with more posts, and better yet, have finally planned a long vacation in October (read: lots of pics and scrapbooking to be done)! :)

P.S. If that isn't the longest run-on sentence you've read, I don't know what is! Hehe!

Saturday, August 6, 2011

Thinking of You Card

I never like when I have to make a "get well soon card" since that means someone is sick, injured or hurting, but it is also an opportunity to try to make something that will help encourage someone or lift them up, so that is the good part.


The basic idea for this card came from a card I saw on Pinterest.com here, by Ashley Newell. It only came together after I received my August kit from Studio Calico which came with those scalloped fabric ribbons from Pink Paislee.


HOW-TO:
  • The paper is called Teal Song by Crate Paper which was made specially just for Studio Calico, and punched with a Fiskars border punch
  • I misted each scallop ribbon with a different color spray mist - Bluegrass by Mister Huey's (bottom-most), Frequent Flyer Sprinklers by October Afternoon, and Lemonade by Mister Huey's. About the misting, I gotta say it is my first application using spray mist and I LOVE IT! It looks great on paper too! The Mister Huey's really impressed me, the way it mists is awesome, but I think I need to give the Sprinklers another try because it seemed to clump a little and leave more of a stained look, like I spilled it in places than a cool, misted look like the Mister Huey's gave.
  • I used a corrugated cardboard butterfly by Jillibean Soup - I pushed it face down into my VersaMark Watermark stamp pad and embossed it with ZING! metallic teal emobssing powder by American Crafts, then I used one of the bigger butterfly shapes and traced the outline on a piece of Butter cardstock by American Crafts, cut it out and layered the cardboard butterfly on top if that
  • The letters are Out of the Blue "Playful" Alphabet from the Lime Twist collection by My Mind's Eye
  • Everything but the butterfly came in the August kit Boardwalk by Studio Calico and once again I proved my husband right in that I always just use the "new" stuff - he says I don't play my old videogames hehe

Wednesday, August 3, 2011

Instagram Pictures

I've been seeing everyone's blogs lately, with professional looking pictures and finally discovered their secret: Instagram! It's a free iPhone download, that allows you to select a filter, and instantly change up the look of your pictures - it's really fun to play with! Here are some of my instagrams. I am definitely looking forward to put these to use in an album soon!


Handsome husband


Garden Center


Real bumblebee! I ran after taking this picture!


New 4-Wheeler = Happy husband


"Hey, I found us a shortcut!"


Adam's Basin along the Erie Canal


This is what we looked like on our honeymoon!


I forget, some car that my husband loves!


Car show


Taking a break to fix my bicycle helmet


Charlotte beach on a school night